Sealing Cremation Urns
Your thoughtfully chosen cremation urn sits on a table waiting to be filled. What next?
Most of us have never held an urn for ashes or had to open or seal one. It is a unique experience that can spawn conflicting emotions. Most urns are not difficult to open or seal. Even though there are hundreds of styles of memorial urns, generally the function of opening and sealing is consistent.
Our planning guide, “3 Steps to Transfer Ashes to a Cremation Urn,” provides details on the first step of getting ashes into the urn. The following information describes how to open and seal most urns. Cremation urns are listed alphabetically by type of urn: biodegradable, glass and ceramic, metal, stone, and wood. If you still have questions or require additional information, please contact our customer care number at 844-671-9744.
BIODEGRADABLE URNS
Paper Cremation Urn
These paper urns are held together by a paper sleeve. They can be used to (1) place in water, (2) bury in the ground where they will decompose naturally.
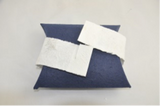

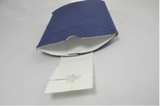
- Gently unfasten and spread the sleeve open.
- Open the flaps on one end of the urn and place cremated remains carefully inside. Take care to stand in a location without wind or cross current when you transfer the ashes from the plastic bag into the urn. You may wish to use a baking or canning funnel to help with the transfer.
- Seal the flap and replace paper sleeve to secure the urn.
Scattering Tubes
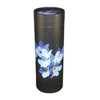
- These scattering urns are made of paper and feature a removable lid.
- Slide off the lid and carefully pour the ashes into the tube. Take care to stand in a location without wind or cross current when you transfer the ashes from the plastic bag into the urn. You may wish to use a baking or canning funnel to help with the transfer.
- The lid has a perforated push-in tab on the lid that opens easily to facilitate scattering.
GLASS AND CERAMIC CREMATION URNS
Stain Glass Urns
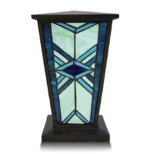
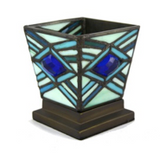
- These wood and glass urns are designed to hold a portion of cremated remains in their base.
- A compartment on the bottom of the urn opens. Remove the screws, then remove the panel.
- Carefully place the bag holding the cremated remains into the urn and replace the panel securely with the screws.
Top Opening Ceramic Urn
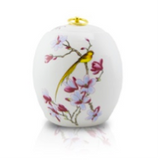
Most ceramic urns open from the top.
- A specially designed lid fits snugly on the urn. The lid does not screw on.
- Remove the lid and carefully place the bag holding the cremated remains into the urn.
- Ceramic cremation urns can be permanently sealed using a silicone epoxy on the lid.
METAL CREMATION URNS
Top Opening Metal Cremation Urns
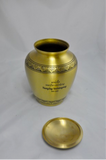
Most metal cremation urns open from the top, with threaded lids.
- Unscrew and remove the lid in order to place the cremated remains inside.
- Carefully place the bag holding the cremated remains into the urn and replace the lid.
- Metal cremation urns can be permanently sealed using a silicone epoxy or metal glue when you replace the lid.
Metal Urns with removable plates on bottom
 These small urns for ashes are part of our mini keepsake cremation urns collection. They have metal plates on the back secured with screws.
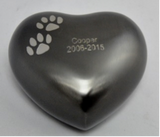
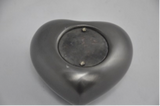
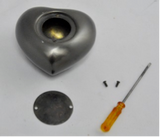
- Remove the screws and set lid aside.
- Place a small bag holding a portion of the cremated remains into the urn. If you transfer ashes directly into the urn, take care to stand out of the wind or cross current when making the transfer. You may wish to use a baking or canning funnel to transfer the ashes into the urn.
- Replace the panel securely with the screws.
STONE CREMATION URNS
Marble Urn with Bottom Opening
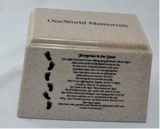
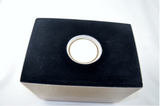
These marble urns have openings on the bottom secured with a threaded plug.
- Remove the plug to reveal the compartment inside.
- Carefully slide the bag into the cremation urn, and replace the plug.
- The urn can be permanently sealed using silicone epoxy when you replace the plug.
Top Opening Stone Urns
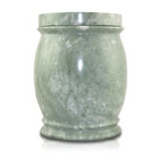
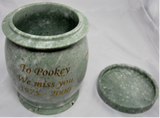
Carved stone urns with openings on top have lids that sit loosely on the urn.
- Lift off the lid and carefully place the bag holding the cremated remains into the urn.
- To permanently seal the urn after the ashes have been placed inside, the lid must be glued.
- A heavy-duty silicone epoxy provides the strongest bond.
Jadestone Urns
These mosaic jadestone cremation urns have openings on the bottom secured with a threaded plug.
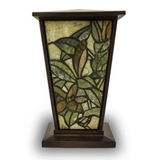
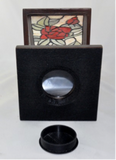
- Unscrew and remove the plug to reveal the compartment inside.
- Carefully place the bag into the cremation urn.
- Replace the plug. The urn can be permanently sealed using silicone epoxy when you replace the plug.
WOOD CREMATION URNS
Wood Urns with Removable Panel on Bottom
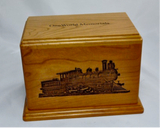
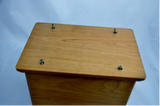
These carved wooden urns open from the bottom with a wooden panel secured by screws.

- Remove the panel, and carefully place the bag holding the cremated remains inside.
- The panel is then replaced and attached with the screws.
- The urn can be permanently sealed. Secure the panel with silicone epoxy or wood glue.
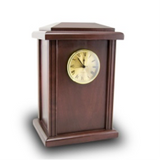
Many frame urn boxes and clocks also open from the bottom with a removable panel secured by screws.
Wood Urns and Memory Boxes with Removable Lid
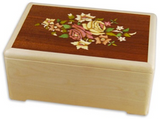
These boxes have a lid that fits snuggly on the top.
- Lift the top off to open.
- Place the bag holding cremated remains inside and replace the lid.
- The box can be permanently sealed using a silicone epoxy or wood glue to secure the lid.
The boxes can also be used as a memory box to hold keepsakes or flowers from the memorial service.
Wooden Keepsake Urns or Memory Boxes with Removable Sliding Lid
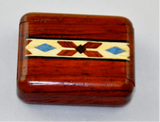
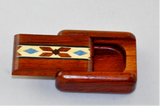
These carved boxes have a panel on the top or bottom that slides open to place a portion of the cremated remains inside.
- Take care to stand out of the wind or air current when placing the ashes into the box. You may use a small funnel to help with the transfer.
- After the ashes are placed inside the urn, slide the panel to its original position for secure closure.
- The urn can be permanently sealed with wood glue or a strong silicone epoxy on the lid.
